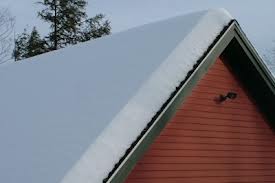
You protect your home from the harsh elements of winter. Shouldn’t you protect your shed too?
There is no doubt that winter is here. Is your shed prepared to handle the wrath of winter? It’s important to make sure your shed is winterized to minimize damage to the contents and the building itself.
Clean your Shed
Clean up the inside of your shed before doing an inspection. It makes it easier to find any weak spots if your shed is empty or mostly empty before you attempt any patches. Make sure you empty your gas-powered tools of all gas and oil over the winter.
Inspect the Exterior
The next step in winterizing your shed is to do an inspection. At first glance, your shed may look fine. But do an up close inspection around the exterior and including the roof. Look for any weakened areas in the building, especially focusing along the seams. Check the roof. If you need to step on the roof, make sure you do a hearty press on the shingles before putting your entire weight on the roof. You never know when you might step in a weak spot.
Keep in mind that overhanging trees might have accelerated any weak spots on your roof, so if you have overhanging trees, make sure they are kept trimmed back away from your roof.
Inspect the Interior
Once you’ve found any exterior issues, it’s time to check the interior. Again, check the 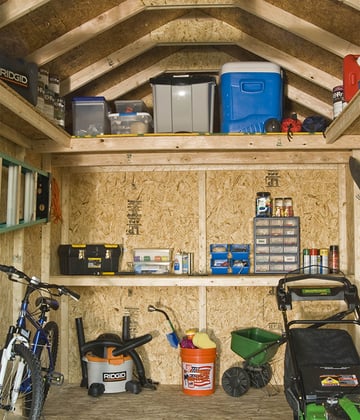 walls, focusing on the seams, if you don’t have lighting inside, use a flashlight to examine the roof so you don’t miss anything.
Shelving and other wall hangings can also accelerate rot or weakened spots. Make sure you check all hidden areas. You want all the weak spots to be fixed before inclement weather strikes, making anything worse.
Fixing the Weakened Areas
If it looks like you’ll be painting large areas, or the entire shed, consider renting a power washer to clean any peeling paint. It will take less time. Make sure you wash a day or two ahead of painting so your shed has adequate time to dry out before painting.
Caulking up any open areas in the seam or cracks along the foundation should also be done before painting. You can also use expanding foam insulation in place of caulk if it’s an appropriate fix for your holes.
Finally, fix all your roof leaks before painting. Hopefully, you don’t have many.
Curled back shingles can be reattached with a good dollop of asphalt roof cement.
Torn, rotten or missing shingles should just be replaced.
Make sure you take safety precautions when working on your roof. When doing roof work: always do it on a sunny day; wear rubber soles; test out your surface before stepping on it; use safety ropes; and watch for power lines.
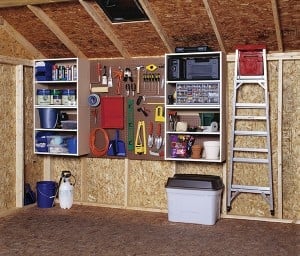
Reorganize Your Tools
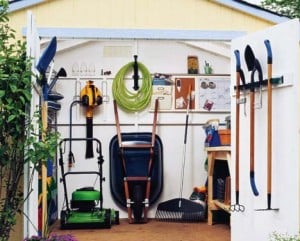 Once you’ve cleaned up, patched holes and painted, if necessary, it’s time to reorganize.
Cover your lawn mower and trimmers with a tarp to keep any water off and to reduce dust. Hoses should be drained. Anything that can’t handle freezing temperatures should be moved to the garage or basement.
Make sure all your winter tools are within reach right inside the door. Shovels, electric chargers, and ice scrapers should be kept easily accessible.
Bring on the Winter
Once you’ve patched up and organized all your tools, your shed should be braced and ready to handle the most severe elements that winter has to offer.